Chair off the street


My son picked up a chair on the street that looked like this chair. It's an Ikea chair and he liked how it fit his back. Hmmm... I couldn't stand to look at that worn out vinyl. I offered to pull it apart and make a cover. It was really easy to pull apart; 4 screws holds the arms to both back and seat, and the seat is screwed onto the roller feet. I pulled the covers off.. the seat was stapled down and the back was zipped on. 


The cover on the inside. There are the toggles... they are only about 2 cm long. You can see how the cover is pieced together. See the toggles are sewn onto the cover separately so I unpicked them too and saw it had some elastic underneath it. The toggles get pulled through from the front of the seat back to the back or underside of the seat. 


Pieces all separated and as you see it was worse than the one advertised on marketplace. I decided there was no point making all that seaming so I just lay it on the fabric and made it one piece for the seat and one for the back. Speaking of fabric, I used some dark denim I had in stash with a very slight stretch. I got it at an op shop a while ago. That was for the direct seat the the back and for the surrounds, I used some very nice quality stretch flat (non shiny) black pleather I bought at Stoff and Stil in Cologne... it was part of a remnant pack for 7 Euro. I knew I wouldn't use it for a garment as there wasn't really enough and don't want to look like a black sausage!


The seat is on a wood base and it was hard getting the staples out. All that tape pulls through from the cover to mould the seat and just ties up. The back has similar that pulls through with some toggles you see above. The toggles were really hard to twist and pull through the foam and it locked onto the backing which is like a strong interfacing. The photos are not in the order I'd like but Blogger has some new look and you can't use the photos like before (super annoying but I won't bore you with that).


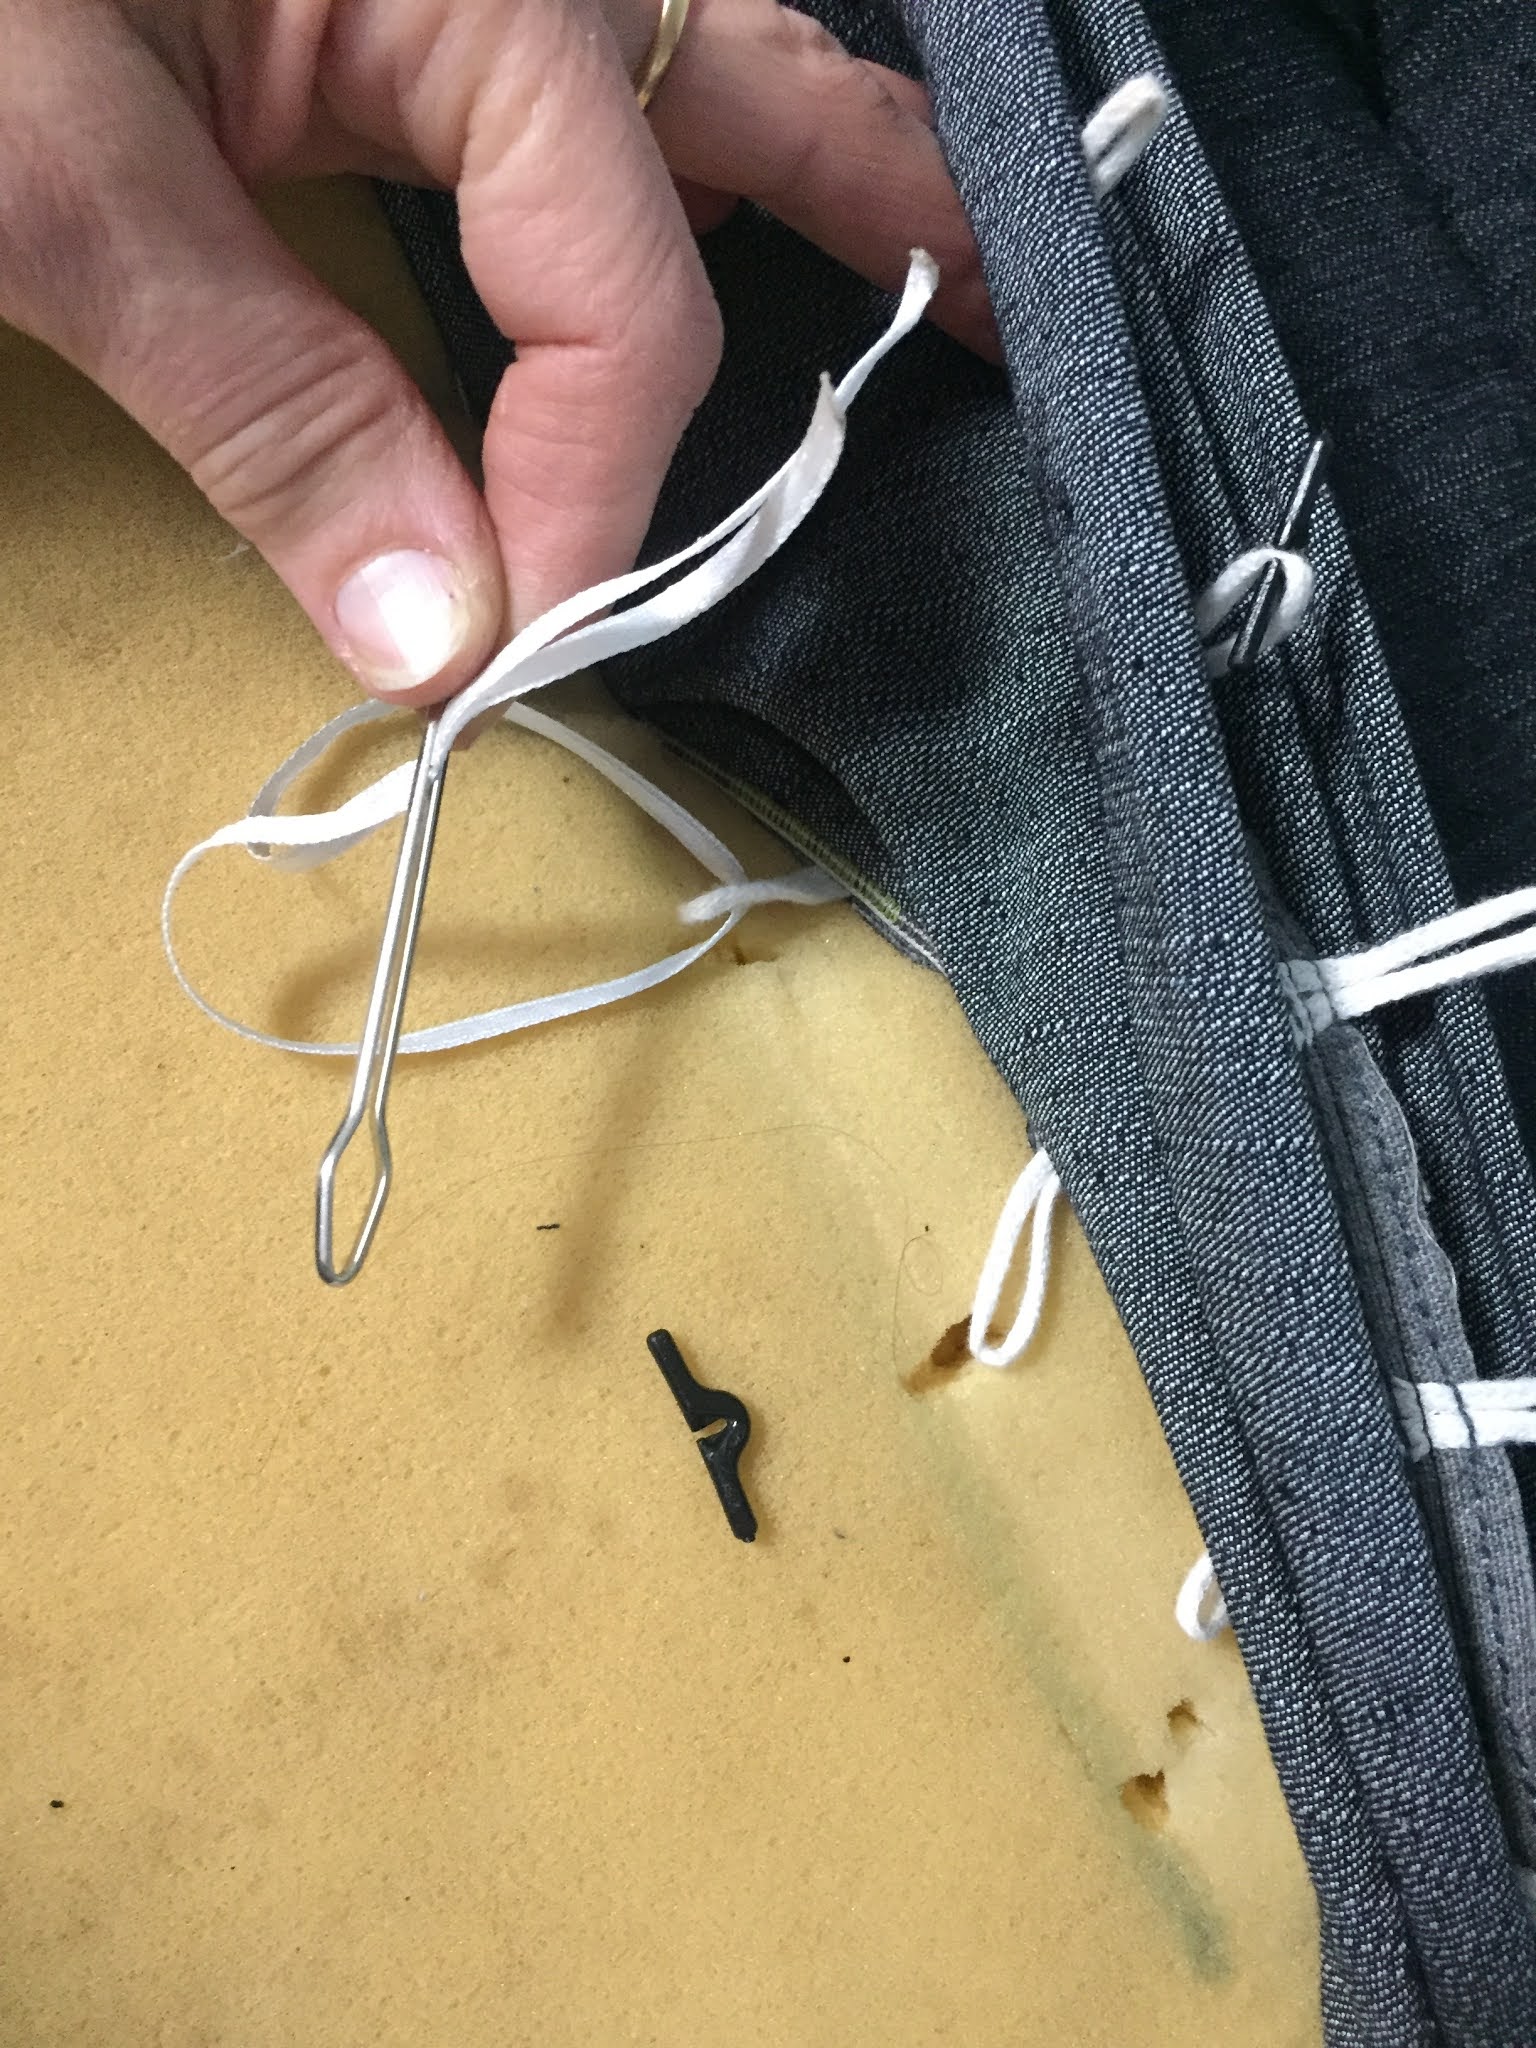
I traced off the cover pieces and sewed them together. It was pretty easy, just the seat one I put the side on incorrectly first and worked it out and unpicked and did it again. Then it was time to pull the tape through for the seat. Hmm... I tried a few things but then thought about a bodkin.  Worked a treat and it was very easy. The hardest part was pulling it tight enough and tying it so it holds the cover down to form the moulded shape. 


I tried doing the seat back then. I realised the toggles pull off so I thought I could use the bodkin to pull the tabs through... they were quite short.. maybe 4 cm long and I just couldn't manage it with just two hands ... I have some nerve issues so I just couldn't pull it firmly enough through to hook the toggles on the get it over the interfacing type fabric.


Then I got creative. Those toggles were never going to work... I pulled some cord through the loops and pushed the cord through the foam holes and then locked it on with one of those chopsticks you get at takeaway sushi. So as I did each one (there was 5) I slipped it into the next one .. that's the last one of one row. There was three rows on the back. I was so pleased to work out a solution and it went very quickly from there. 


Next was to  find the staple gun to pull the sides around on the seat base. 


THat's me getting some through the back of the chair. I overlocked it too because the denim is a heavy weave and was fraying a bit.

I got some black interfacing I bought cheaply which does not iron on well and covered the underneath for a professional finish. You can see the topstitching around the edge of the cover and the denim and pleather. Colour is exactly how it looks there. I am glad I topstitched as it really hold the seam down and helps to keep it from stretching and separating. 


Ta da! Finished chair.


Underneath of the chair with the base screwed on. Only thing .. the wheels don't spin so well and my son, who was thrilled with the transformation, was checking to buy some replacement castors from Ikea but they were really expensive. Then we tried to harvest from another chair but the stem wasn't the right size. He was a bit upset and I showed him how they are pushing down on inside and not rolling. I suggested he google to see if there was a fix and of course there was. They aren't terrific but may mark the wooden floor so I am picking up a roll matt from Marketplace seller tomorrow night. My son is thrilled and we have used stash fabric, saved a chair from landfill and saved money. My son is really happy with the support it gives too. I dragged this out a bit as I didn't have a lot of time but if you had a number of hours it's not a hard job. The hardest was definitely the toggle bits for the back. Everything else is pretty easy. 
The EU has rules about disassembling goods so they can be recycled easily and that works in your favour if you get an Ikea chair as it just came apart and together very easily. So pleased with it.. nice and clean and with the cotton denim it will be much more pleasant to sit on in our hot weather.

Comments

CherylStillSews said…
Great job. Those type of saves can be so satisfying.
katherine h said…
WOW! Great save. Re-upholstery projects are always so much harder than they first look. You are so clever and have done a great job of this.
Carol in Denver said…
Don't we get so much pleasure from doing things for our kids! I hope he appreciates it; it looks great.
Patricia said…
You really are amazing! Well done for persevering with it through the tricky bits, and it looks very smart indeed refurbished. I am sure your son loves it, and is proud of his Mum. xx
Audrey said…
That chair looks brand new. I know what a lot of work reupholstering/recovering furniture can be. Kudos to you

Popular posts from this blog

Trying a vintage togs pattern.

                       Hello, it's been a while again. Not as long as some bloggers who have recently returned to blogging...up to 7 years, but I'm glad people are coming back. I never joined Instagram as I'm not that fussed on 'social media' and more with people who write about their sewing.  So back to sewing. I picked up this vintage McCalls togs pattern. It's quite a good value pattern as there are three very different and interesting swimsuits included. That's pretty rare. It's a size 16. I decided to make view B. All of the patterns have pieces for the bra cups too which is really great. Photographed with it is a Burda beach wrap. I can't find the magazine number right now, but it's at least 10 years old. Basically it's a large square of fabric with arm holes cut out. The fabric is genuine 70s towelling. I know because Mum bought it to cover our 'fantastic plastic' vinyl couch. Vinyl was preferred back then...

Kwik Sew

So recently Spotlight had Kwik Sew patterns - 3 for the price of 1. I don't really need any patterns as I have plenty but some took my fancy and I'm keen to sew some up. I have been really liking the waterfall jackets... I have a Butterick pattern (not mentioned yet but brought over from the US with a friend... that's another post though), a New Look cut out and I liked the length of this Kwik Sew one too. I was seduced by Kristy's beautiful version  of the jacket on the right. Don't expect to see it fitting me so perfectly but it looks nice and easy and it's a bit different and a bit timeless too. I was thinking of sailor type pants but when I saw this shorts pattern, I thought I could make them up and see if they suit and I may be able to lengthen the legs and not have to trace out a Burda one. Not sure how KS patterns fit me as I've only made a dress a while ago now. I have these cut out from a leftover piece that was not enough for anyth...

Island night... PNG cruise

Well hello again. I've just come back from a cruise to Papua New Guinea and I made a dress for Island night. Island night or any theme night is just a suggestion... there is no organised event, meals, activities; just a dress code suggestion.  As soon as I read that, I searched for this vintage surfie fabric I bought years ago at an op shop. I was thrilled to use it. I needed an easy pattern that I could make 2 days before the cruise departure and one that I would wear again.  I used this Style 2911 pattern that I only bought online a few months ago. Style are my favourite patterns. I cut out a size 16 but had to reduce it to the 12. It's a great simple but elegant pattern and it went together perfectly. My machines liked it too... they cooperate when they like what I'm making and it was a breeze.  I cannot believe that we didn't get one photo of it on. I was thrilled with it and even tho there is some ink staining you can't really see it as it's so busy. I had ...